Illustration How to Create Competent Line Art Using Adobe Illustrator
Illustration How to Create Competent Artwork - Adobe Illustrator Tips
Many's the time that I've come up against a project that's made me want to throw in the towel. Usually it's because of my limitations as an illustrator. In my youth I did a lot of painting and drawing because I enjoyed it - but I was never really any good. When I got into graphic design I didn't feel that I had given up painting - just that I'd changed medium. Now I know I'm a better graphic design than an illustrator.
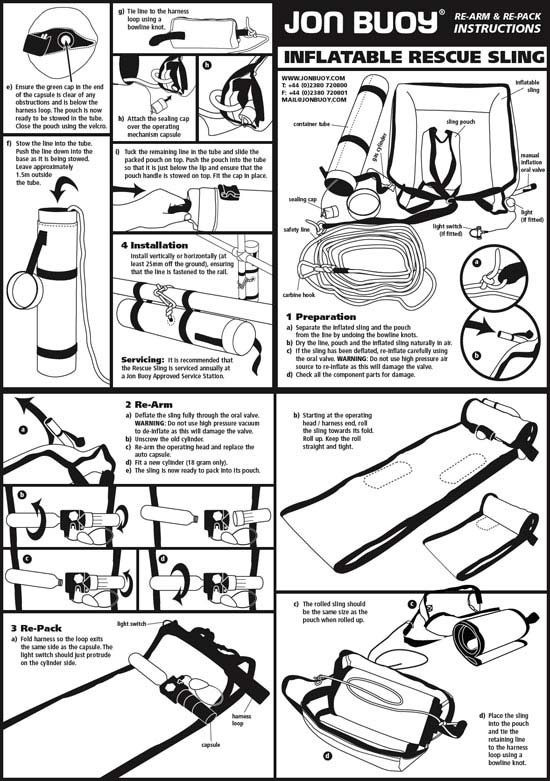
So when a project I'm working on involves illustration and the budget doesn't extend to commissioning artwork from an illustrator, I get nervous - but I always find a way through. The project shown on this page is just such a case. We were charged with the task of designing and illustrating a series of manuals and labels for marine safety equipment. The illustrations had to be clear and easy to follow - if someone has to deploy a rescue sling in a hurry, they don't want to spend five minutes trying to decipher garbled instructions!
![]()
So how did we achieve this? Good old fashioned tracing in Adobe Illustrator. There's no shortcut to creating high quality work, but it needn't take forever either. For this project we first sketched out roughs for the labels - we then knew what text had to go where and what illustrations were needed by way of explanation. We then took photos of the items as we wanted them to appear, imported the photos into Illustrator, locked them on a layer and started to trace.
Don't use something like Live Trace for this kind of work. As good as it is, it overcomplicates things, and it'll take longer to simplify and clean up the resulting artwork than it will to trace what you need from scratch.
Illustration How to Create Competent Artwork
Case Study: Man Overboard! Create Adobe Illustrator Graphics
Below is a photo of my trusty assistant, Jacob. He has donned an inflatable horseshoe and pretended to be floating as a man overboard would be. Although he would be more distressed than he appears to be here, it's better to keep the expression neutral!
![]()
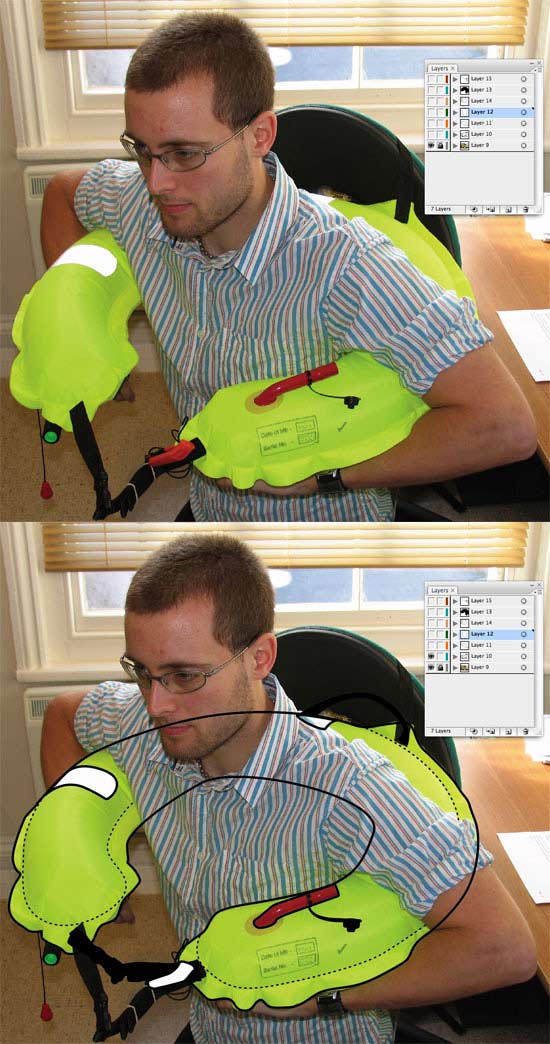
Illustration How to Create Competent Artwork
Lock the photo layer and build up the illustration in layers over the top
The photo layer is locked in the background, and then we add layers, building them up as we go. I always lock a layer when I'm not working on it to make sure I don't mess anything up that I'm not working on at the time. And always keep a .AI file as your working file. When the time comes to create an .EPS file for import you can delete the (hidden) background photo layer to keep the file size down.
![]()
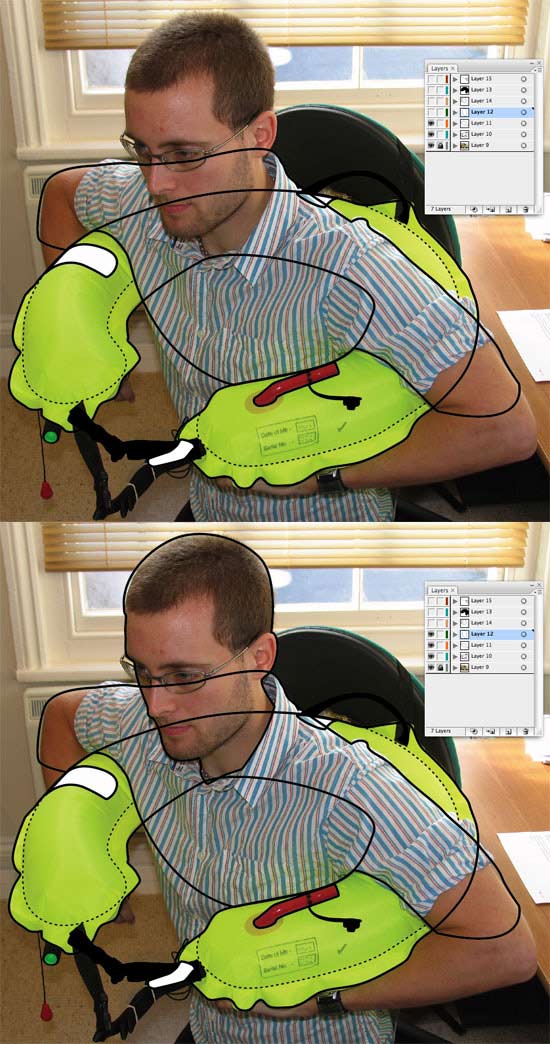
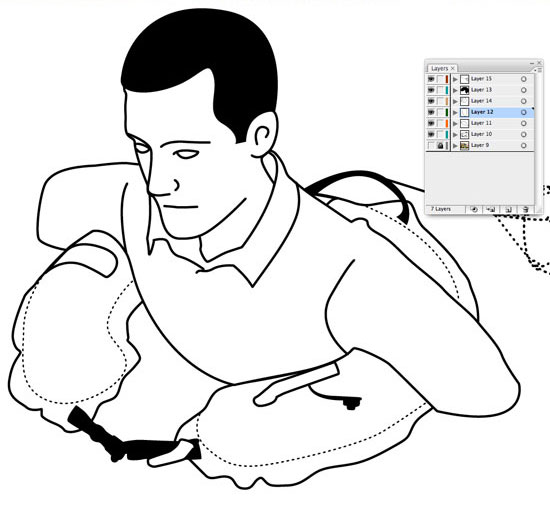
Illustration How to Create Competent Artwork
Don't forget to lock layers you're not working on
Background objects stay in the background - I don't add any fill colours initially because my view of the guide photo will be obscured. Once the main objects have been created, I move onto details such as facial features etc. The fact that this has to be a black and white drawing forces you to be ruthless about what needs to be shown and what doesn't. For clarity, some objects which might be a light colour may need to become black to define them better. If the illustration was to be in colour it would help to define areas more precisely. This is great observational practice!
![]()
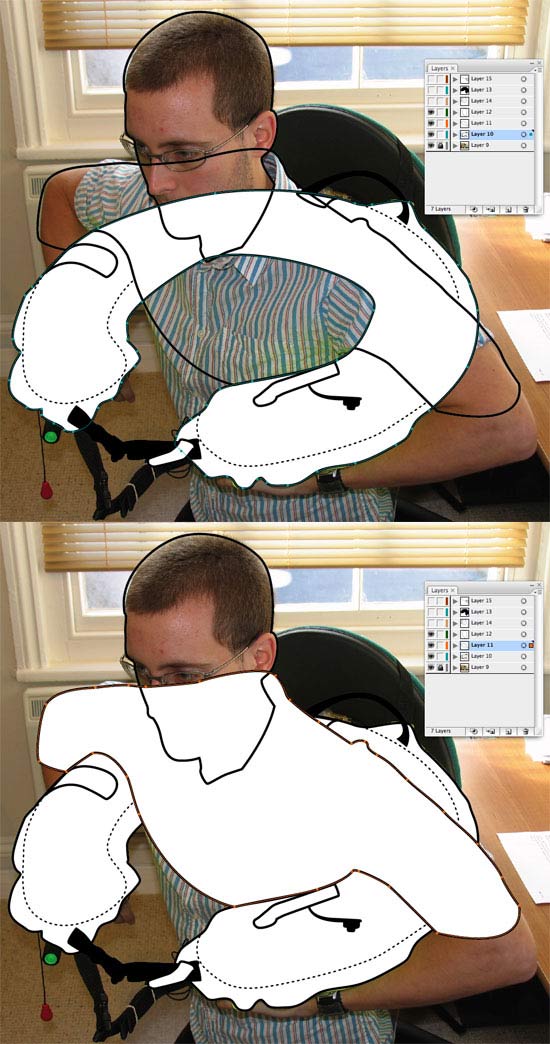
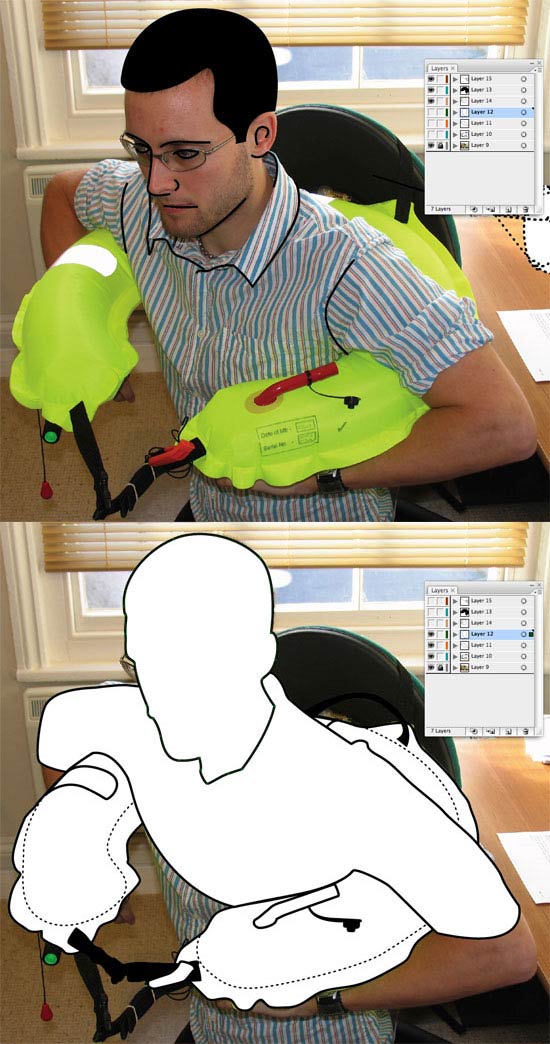
Illustration How to Create Competent Artwork
Tweak the finished illustration yourself until satisfied
Once the facial and other features have been added, you can turn off the photo layer and start to tweak the illustration itself. Even if a path follows the photo precisely, the finished drawing might still appear to look strange here and there - either because of strange perspective or an over-complicated item like a knot. This is where your artistic and observational talents must come into play. Tweak the illustration until you're happy. And there you have it! Simple, clear, competent looking Adobe Illustrator graphics for the portfoilio. Thanks to Jacob for going overboard - and happy drawing!
![]()
Resources & More Information
- More Adobe Illustrator Tutorials
- Photoshop Clipping Paths
- Free Method of Converting Quark to InDesign
- 4 Color Process Printing and Spot Color Printing - What's the Difference?
- Return from Illustration How To Create Competent Line Art to Home