Convert Publisher Files to InDesign Using the Pub2ID plugin
Convert Publisher to InDesign
In a graphic design studio you'll see pretty much every format of document over time, and most of them can be either improved upon or converted for use in a more press-friendly program like InDesign or Quark XPress.
MS Publisher® can be a particularly unwieldy format to receive from a client, and more often than not we have to ask them to supply a PDF file which we can recreate from scratch, since there has been no reliable way (that I've found) to convert the files. Recreating files is time consuming though, so I was interested to hear about the Pub2ID* plugin (*now discontinued) from Markzware... would it do the job?
I already use the Q2ID and ID2Q plugins which do a pretty good job of converting their respective formats, so I was confident that the Pub2ID plugin would perform similarly well; and for the most part, it does.
However, it'll never make as good a conversion as Q2ID or ID2Q because for all their differences, Quark and InDesign are in most functional respects extremely similar. Their built-in tools, shapes, text boxes, swatches, objects and text styles all behave in a similar way, making their conversions much more predictable. Unfortunately, Microsoft Publisher is more a law unto itself. It has built-in 'Word Art', 'Border Art', 'Gallery Design Objects', 'Fill Effects' and numerous other Publisher-specific attributes and elements, all of which make an accurate Publisher to InDesign conversion more difficult.
Markzware (the author of Pub2ID) is very open about these issues, and the accompanying user guide gives very detailed descriptions of what is and isn't supported by the plugin (which works with both InDesign CS3 and CS4). As Markzware makes clear though, even an approximate conversion is a great deal less time consuming than recreating a document from scratch.
The purpose of this article is to give an idea of what to expect from a standard conversion, with screenshots of the results you'll end up with. The Publisher files were created using MS Publisher® on a PC and converted using InDesign CS4 and Pub2ID on a Mac.
Converting an MS Publisher Advert to InDesign Case Study
All of the following examples (except the last one) were created using the standard templates available in MS Publisher and weren't edited in any way. Here's a screenshot of the original advert in Publisher:
Convert Publisher to InDesign: Publisher File

When making any conversion it's a good idea to get your client to supply (if possible) a PDF file or a screenshot along with the Publisher document so you can get an idea of how the finished item is supposed to look.
Here's a screenshot of the PDF version of the ad:
Exported PDF File Opened in Acrobat

To convert the file, install your Pub2ID plugin into your InDesign Plugins/Filters folder. Once activated, a new Markzware menu item will appear alongside the existing InDesign menu items. Select Markzware/Pub2ID/Convert MS Publisher® Document... and select your Publisher file. The document will then be imported into InDesign. Here's the result we got:
Imported InDesign File

Here they are side-by side (MS Publisher on the left, InDesign on the right):
Original Publisher File (left) and Converted InDesign File (right)

The converted file makes extensive use of the Text Wrap feature in InDesign, and tends to fill all text boxes with white, so be aware of this before trying to nudge text boxes and frames around. If you nudge a box which is being affected by the Text Wrap values of another element, the box will move around whilst leaving the text inside where it is. Either remove Text Wrap from the item affecting it, or check the Ignore Text Wrap box under Type/Text Frame Options... .
Once the correct fonts have been installed (or appropriate substitute fonts) you'll probably find that the text sizes and leading will need attention. A little tweaking, removing Text Wrap and White Swatch fills will sort out the layout pretty quickly.
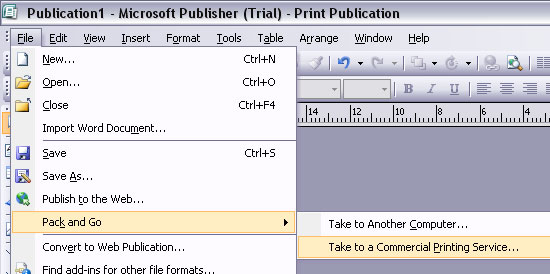
If the MS Publisher file has been exported using the 'Take to a Commercial Printing Service...' as shown below (and hopefully it has), all the embedded images should be supplied in a separate folder, and you'll need to make sure the links are resolved to the correct image files. Generally the line art (like the items shown here) will be saved as Illustrator-compatible vector-based .WMF files which should be opened, converted to CMYK (if for press), re-saved as .EPS files and re-linked or re-imported to InDesign.
Packaging Feature in Publisher
If the file hasn't been exported in this way, but if a PDF has been supplied with the document, you should be able to open the PDF file in Illustrator to extract any vector graphics such as the logo or airport graphic in the advert example above. Copy and paste these into a new Illustrator document and save them as EPS files. Then these can be imported into InDesign as new graphics and placed appropriately. If there are raster images (photos or similar) then the PDF file could be rasterized in Photoshop and saved as TIFF or Photoshop EPS files. Make sure they're CMYK if the document's going to end up being professionally printed.
As you'll see in the example advert above, the only absentee (apart from text formatting) is the starburst from the top left corner. This has disappeared because it was an 'Autoshape' some of which are unsupported by Pub2ID.
There are two ways to recreate this. The most accurate method would be to extract the starburst from the accompanying PDF file which can be opened in Illustrator. Copy the starburst into a new Illustrator file (as explained above) and save it as an EPS which can be imported into InDesign. Here's the PDF file opened in Illustrator:
PDF File Opened in Illustrator

If you don't have a PDF reference file, you can recreate the starburst in InDesign using the Polygon tool (double-click it to view the star inset options), or you can recreate it in Illustrator using the Star Tool, and save the file as an EPS to import separately.
Obviously if you only have the Publisher document to work from with no reference PDF file, you'll only be able to guess at what elements have not converted correctly, but hopefully you'll be able to get a screenshot or printout for reference at the very least. Here is the final converted InDesign document after only a few minutes of tweaking:
Final InDesign Conversion After Tweaking

Other File Conversion Examples
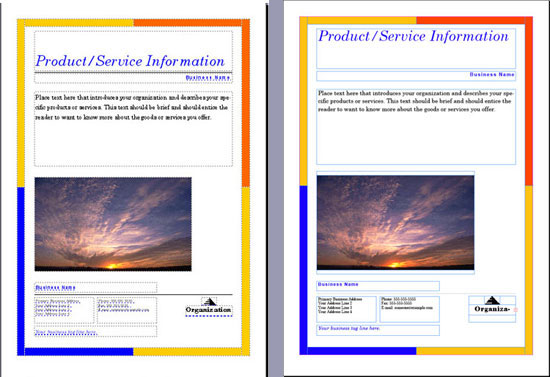
Below are three more sample conversions showing the original Publisher file next to the converted InDesign file exactly as converted, with no tweaking. You'll notice that generally the text box positions are correct, but the text within has shifted position. Also, in the business card below the flower image has lost its color attributes. This'll need to be sorted out in Photoshop.
Convert Publisher to InDesign: Business Card – Original Publisher File (top) and Converted InDesign File (bottom)

The flyer below was also a standard MS Publisher® template shown converted to InDesign, as yet with no tweaking carried out.
Convert Publisher to InDesign: Flyer – Original Publisher File (left) and Converted InDesign File (right)
Although the conversion is pretty faithful, the color swatches reveal a range of RGB colors, all of which will have to be converted to CMYK before being sent to press. The photo in this case (rather shockingly) turned out to be an Index Color Mode, 72DPI extremely low resolution image, completely unsuitable for press. Hopefully the files you'll receive will have high res images embedded, but if not, this will have to be addressed prior to going to press.
Convert Publisher to InDesign: All Color Swatches are RGB. Double-click each one to convert it to CMYK.

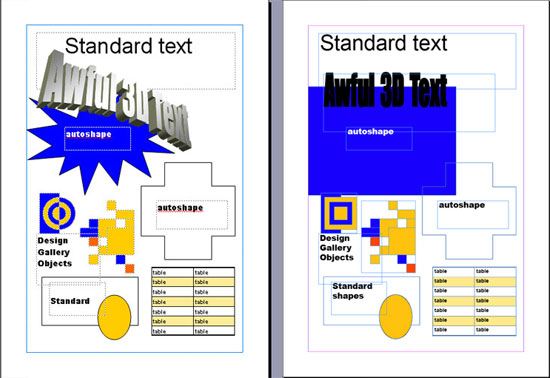
The reason for including the example below was to demonstrate how some of the Publisher features such as 'Wordart' are handled in the conversion. As you can see, some of the Autoshapes convert correctly and some (like our friend the starburst) do not. The Wordart retains the basic text color and font, but ditches the 3D effect. This can be recovered either by recreating it as closely as possible using the Illustrator 3D tools, or by importing a PDF version of the document (if supplied) into Illustrator. To achieve the latter, copy the vector information and paste it into a new Illustrator file (the Wordart is conveniently converted to outlines when you open the file). This can then be imported as an EPS into InDesign.
Other items, like the Design Gallery Objects, vary in their faithfulness to the original. Tables import reliably and retain their features in InDesign.
Convert Publisher to InDesign: Miscellaneous Elements – Original Publisher File (left) and Converted InDesign File (right)
Convert Publisher to InDesign
Conclusion
I find Pub2ID* to be a handy addition to my arsenal. Although we probably won't use it much (fortunately we don't get sent too many MS Publisher files) when we do need it, it'll save a great deal of time. At the very least it'll import ungarbled text into a new document to save OCR time-wasting or re-typing. At best it'll save hours of design time by doing most of the initial layout work for us. However, knowing MS Publisher, we'll probably need to do some re-designing anyway...
*discontinued
Resources & More Information
- Q2ID - converts Quark Files to InDesign Files
- ID2Q - converts InDesign Files to Quark Files
- Quark to InDesign Conversion Service - Tinstar Design
- Case Study: Convert InDesign to Quark Using ID2Q Quark XPress Plugin
- Case Study: Free Quark to InDesign Conversion Method
- Case Study: Convert Quark to InDesign Using Q2ID InDesign Plugin
- Case Study: Convert Quark to InDesign CS4 Using Q2ID
- InDesign updates from Adobe - Mac users click here and Windows users click here
- Return from Convert Publisher to InDesign to top of page