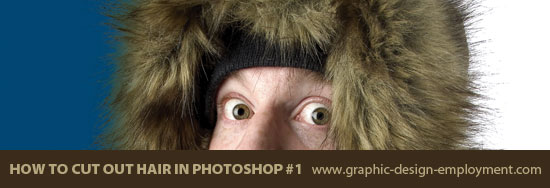
Cutting Out Hair in Photoshop
If you're cutting out hair in Photoshop there are a number of approaches you can take, depending on the attributes of the image you're working with. This is one of a series of tutorials which demonstrate how to extract hair from different types of background. You can either read on, or view the Photoshop video tutorial below.
Cutting Out Hair in Photoshop - Tutorial
Video Tutorial Part 1
Cutting Out Hair in Photoshop - Tutorial
Video Tutorial Part 2
Pros and Cons of the image...
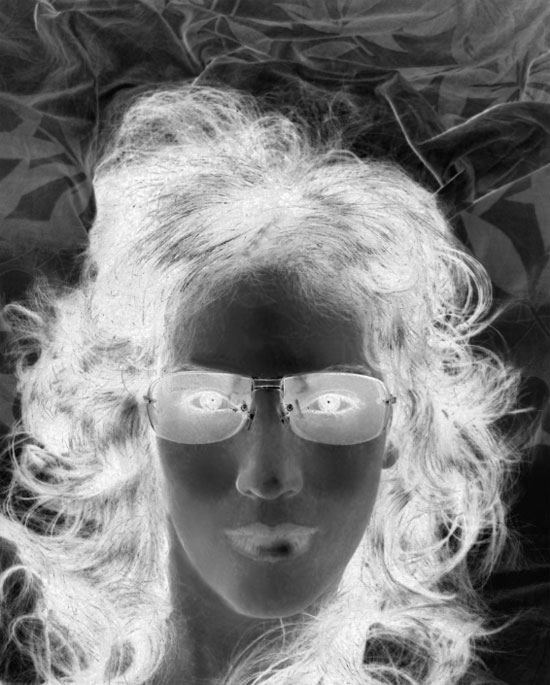
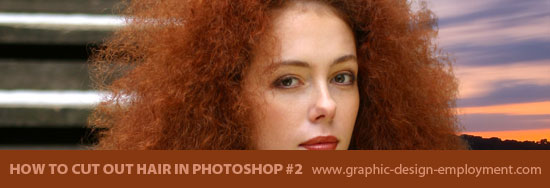
The image featured in this tutorial (below) has a complicated, multicolored, patterned background working against us. Luckily however, the hair color is very dark, so this'll help us create a cleaner mask.
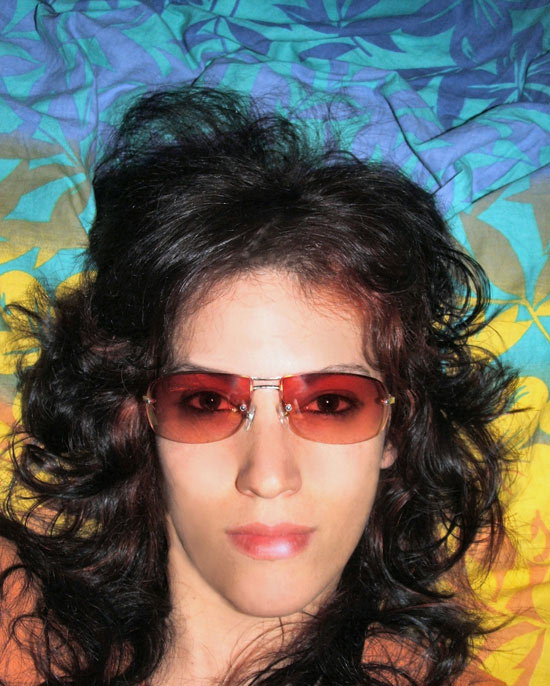
First, select an image to work with
Before you get started, if you want to use the same image as I've used, you can download it from the free photos section at stock image library, Dreamstime. Just type 1812079 into the Free Images search field. Alternatively, choose one of your own images. If you need a suitable image to work on, here are a bunch of hair images from Dreamstime.
Cutting Out Hair in Photoshop - Tutorial
Get Started on the Layer Mask
Create layers from each channel
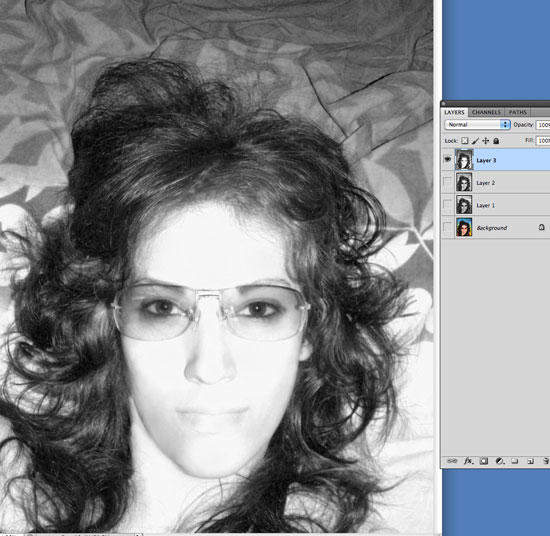
If working in RGB color mode, when you click on the Channels palette tab, you'll see a different channel for Red, Green and Blue. If you click on each of these in turn you'll see that different areas of the image display different contrast, depending on the colors present in that channel / color plate. For example, there's a lot of red in the face and glasses. When you click on the Red Channel, these areas will be very light, whilst areas with very little red in them will be much darker. It's these areas of light and dark that we're going to use to create a mask for the hair and face.
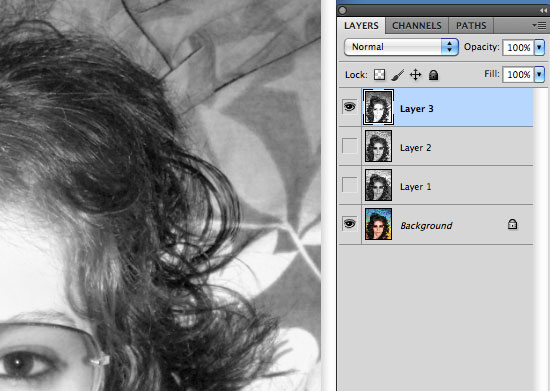
The first step will be to create layers from each of the channels so we can refine the areas of high contrast and delete the areas of low contrast. To do this, select and duplicate each channel in turn by right-clicking on the channel and selecting Duplicate Channel... Then select the channel copy you just made (below).
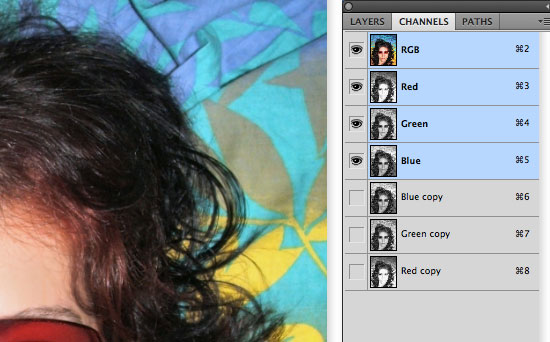
With the copy selected (for example, Blue copy), Select/All, Edit/Copy. Click on the RGB channel, return to the Layers palette and paste in a new layer. When you Edit/Paste, a new layer will be created automatically (below).
Identify clean areas of contrast in each layer
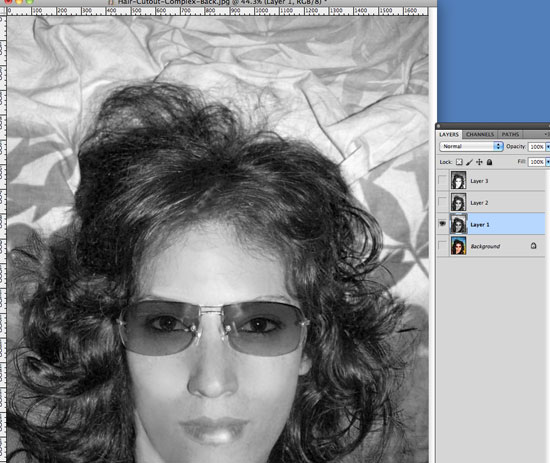
Looking at each of the new layers in turn, we can see that some areas have clear contrast between the light background and dark hair, whilst other areas are much less easily distinguished. For example, in the image below I've selected the layer made from the red channel. Around the edges of the hair in the lower half of the image there's clear contrast between light and dark. But in the top half there's much more gray.
On the other hand, the copy of the blue channel (below) shows more light / dark contrast at the top than at the bottom. What we're going to do is exploit these differences. We'll delete areas of the layers that have poor contrast and keep areas with good contrast, merge the resulting layers and hopefully end up with a much better starting point for the cleaning-up process.
Delete areas of poor contrast on each layer and merge resulting layers.
So you can work non-destructively, create a mask for each layer. To do this, select each layer in turn and click the Add Layer Mask button at the bottom of the Layers palette. Starting with the red channel / layer (called Layer 3 in my document), choose a soft airbrush for the eraser and delete all the areas of poor contrast (below). If you keep the blue channel / layer visible underneath, you'll start to build up a picture of what the high contrast result will look like.
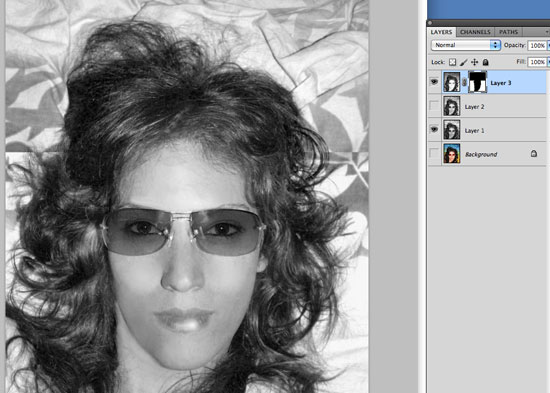
Repeat the process for the green channel / layer, moving it to the top of the Layers, adding a mask and erasing what you don't want to keep (below).

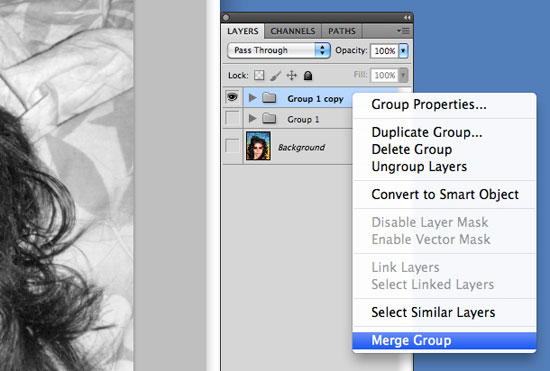
Once done, merge all three layers. You might want to keep a copy of them first - I do this by selecting them, choosing New Group From Layers... from the submenu (top right of the palette), duplicating the new group, right-clicking of the Group copy and selecting Merge Group (below).
Invert the layer and start to block in white and black
At this stage we want to invert the merged layer (below) and start to paint over the areas we want to keep with white and the areas we want to lose with black.
This is a rough process to begin with, and we don't want to accidentally paint over any areas where the detail of the hair and the background merge. When doing this it's best to paint the white and black on separate layers and merge all three at the end when we're confident there's no unwanted overlapping. We should end up with something like the image below.

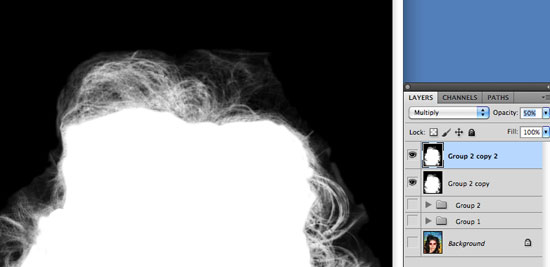
Merge three layers, duplicate the merged layer and multiply the top one
Once you've got to stage where you can't block in any more white and black without encroaching on fine detail, merge the white, black and inverted layers (making a backup group copy of them first), duplicate the merged layer, click on the top copy and select Multiply from the Blending Options popup menu. Take the opacity of the multiplied layer down to about 50%, or until you feel that the best compromise has been reached. Once done, merge the two layers
The idea here is to get rid of as much of the hazy background remnants as we can whilst destroying as little detail as possible. There are always trade-offs like this to be made when working on an image like this.
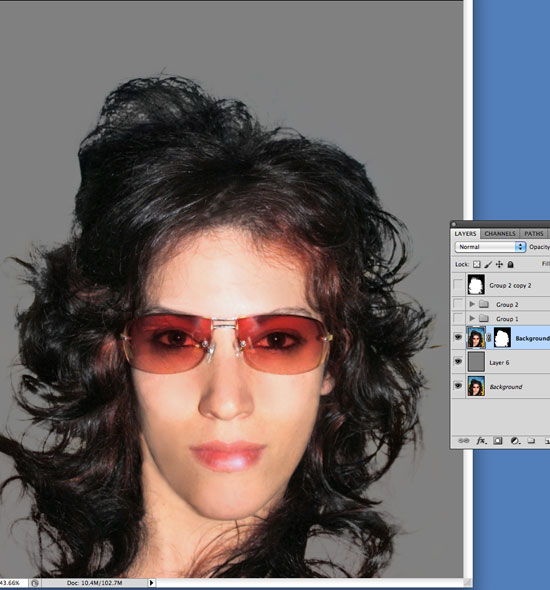
Create a new channel from your layer, make a selection from it and apply it as a mask to a copy of your background layer
As can be seen in the above image, there's too sharp a division between the area of white and the fine hair detail. This is where we bring the Dodge and Burn tools into play. We could continue to work on the black & white layer, but if we apply it as a mask to the actual image, we can actually see the results take shape as we work on the mask.
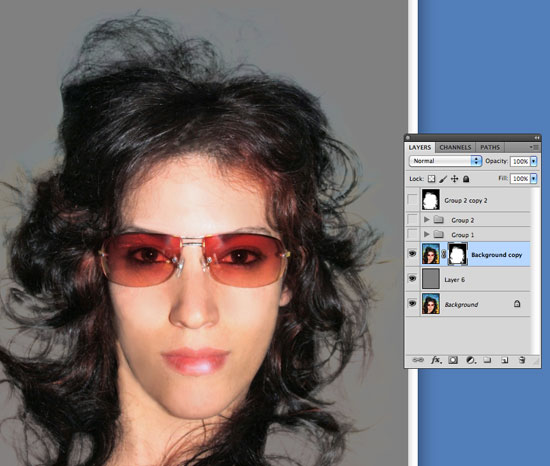
Once the two Normal & Multiplied layers have been merged (above), choose Select/All, Edit/Copy and click on the Channels palette. Click Create New Channel at the bottom and Edit/Paste the copied layer in as the new channel. Command/Click on the channel to make a selection of it, return to the Layers palette, duplicate your background layer and (with the background copy selected) click the Add Layer Mask button at the bottom of the palette.
Finally, create a layer below the masked layer and fill it with 50% gray so you can see what you're working with (below).
Cutting Out Hair in Photoshop - Tutorial
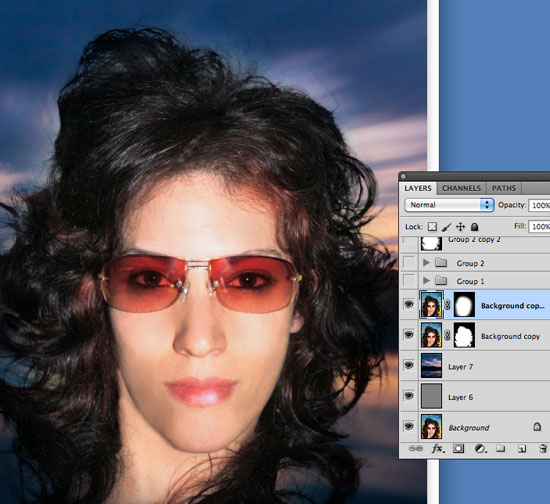
Start Working on the Image and Refine the Mask
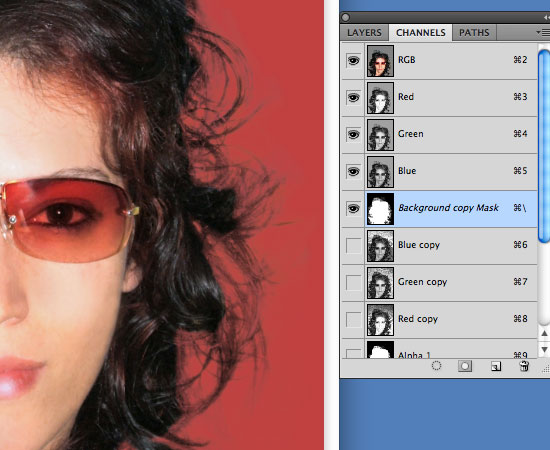
From this image it's pretty clear that there are areas around the hair that have picked up some of the colored background. In order to begin to improve this situation I'm going to use the Dodge and Burn tools on the mask (Dodge to lighten areas we want to keep, Burn to darken areas we want to lose). Then I'm going to use the Sponge Tool around the edges of the image itself to desaturate some of the remnants of the duvet cover from the background.
Select the Mask and use Dodge and Burn
With the Layer Mask selected on the active layer, click on the Dodge Tool in the Tools palette. In the Options palette choose Highlights from the Range popup menu. Make the brush reasonably large and with no hardness. Then (remembering to keep the active Layer Mask selected) start to gently paint over the areas of fine hair details that need darkening up around the girl's head. Anything that you lighten up on the Layer Mask will appear on the actual image.
If you keep the "Indicated Channel Visibility" eye toggled on in the Channels palette, a red mask overlay will help you see what's going on (below).
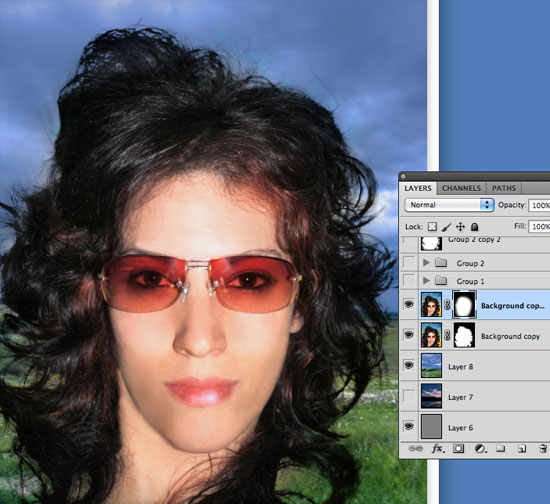
How much work we do at this stage depends largely on the type of background we're eventually going to use. For example, we'll reach a point with this project when the image will still very happily over a lightish background and the results will be effective. However, the same image might work badly over a darker background, so it's up to us to tweak it until it works.
Going back to the active layer and Layer Mask, work your way around the image until you're satisfied that the hair looks dark and detailed enough. Then select the Burn Tool. This time, choose Midtones from the Range popup menu and reduce the Exposure to 50%. Now (using a similar brush to that of the Dodge Tool and ensuring the Layer Mask is selected rather than the photo itself) start painting around the areas around the head where the background seems to be encroaching.
Select the Image and use Sponge
The last step is to use the Sponge Tool around the 'haloed' areas of hair around the edges to desaturate the color creeping in from the old background. So with the working layer selected and with the image (rather than the Layer Mask) active, select the Sponge Tool from the Tools palette. Select Desaturate from the Mode: dropdown in the Options palette and start brushing around the unwanted colored areas. Once done we should have a result that looks like the image below.
Cutting Out Hair in Photoshop - Tutorial
Add the New Background
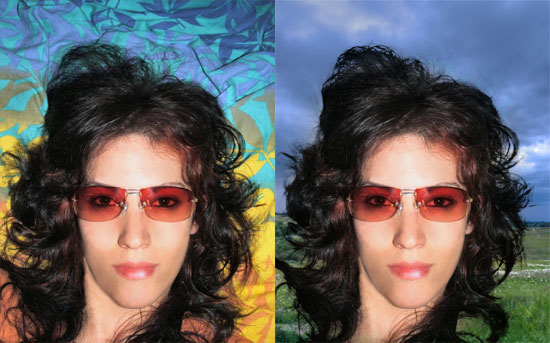
There are still some areas that need work in the image above, and the more time spent on the finer details, the better the result. Once you've got the image lookig as good as possible, the final stage is to drop in a replacement background.
For this image I have a dark background as well as a mid-range background so as to demonstrate how to adapt the image for either.
Create a new layer beneath the image and either paste of place your preferred background. The first one I'll try is a dark one.
Duplicate the masked layer and Multiply lower layer
In order to blend the edges of the hair into whatever background we decide to use, we're now going to multiply the active layer into the background and paint in areas of light within the edges. First select Multiply from the Blending Options dropdown. Next, duplicate the active layer and select Normal from the Blending Options.
With the upper layer's mask selected, Select/All and hit Delete (making sure that the default fore/background swatches in the Tools palette are applied). Now Command-Click the mask channel of the layer below to make a selection (this'll stop you painting outside the boundaries of the cutout) and using a large, soft-edged brush, start painting in the image from the center outwards. Try to make the blend from light to dark as subtle as possible near the edges (below).
This method works equally well using a lighter background, although often some tweaking is required (below).
The Finished Image - Before and After
Cutting Out Hair in Photoshop - Tutorials
Below are all the tutorials I've created to demonstrate different ways of cutting out hair in Photoshop:
Resources & More Information
- Photoshop Cutouts that Blend
- Return from Cutting Out Hair in Photoshop to Home
- Free and Royalty Free Stock Images