How to do a Hair Cutout in Photoshop Without Using Paths
So you need to do a hair cutout in Photoshop. What's the best way? Using paths would be a nightmare, and they'll look awful. Clipping paths are great for hard edges and clearly defined divisions, but when you start trying to cut out individual strands of hair and fur it's a waste of time. The best thing to do is to blend the image with the background in Adobe Photoshop and place the file as a flattened TIFF or layered PSD file. Below is just one way to tackle the subject.
![]()
Here's a quick tutorial on how to do a hair cutout in Photoshop using Blending Options in the Layers Palette. You can either read on, or view the Photoshop video tutorial below. If you need a suitable image to work on, here are a great bunch of hair images from Dreamstime, which also has a Free Images section.
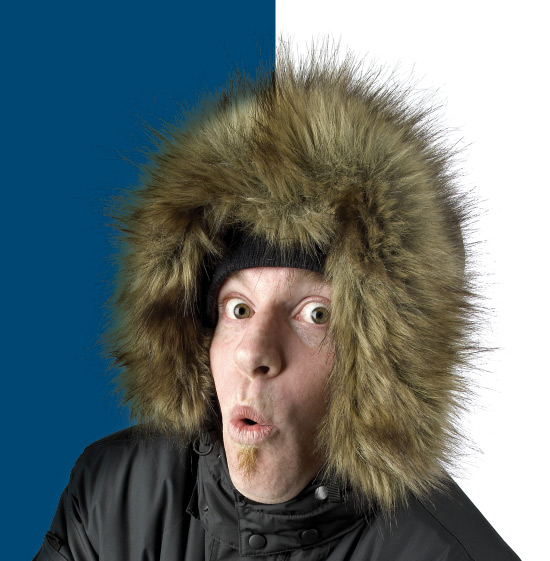
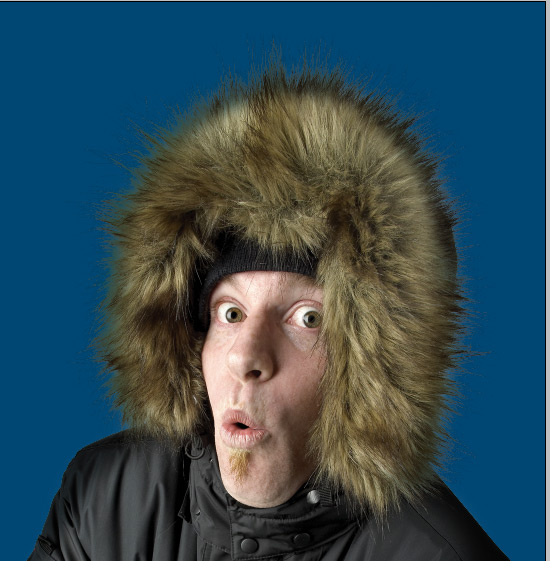
To start our hair cutout in Photoshop we begin with an image of a guy with a furry hood on a white background. I chose this image because the fur would be impossible to cut out effectively using paths.
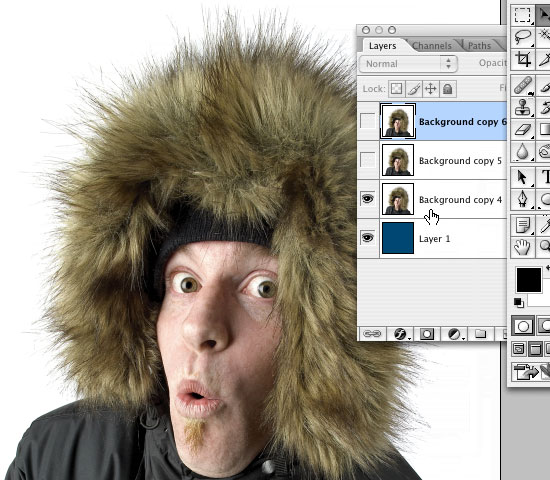
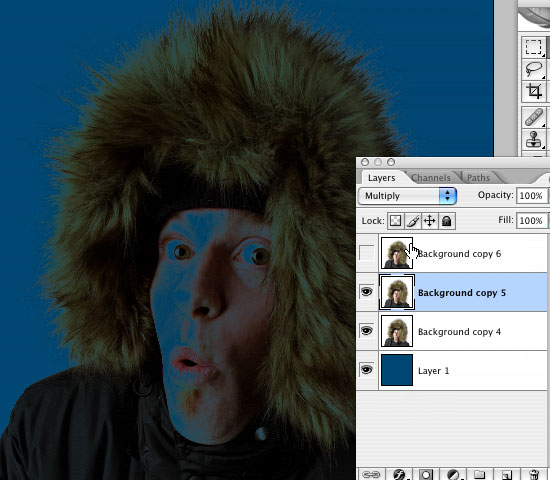
I'll be putting the image over a blue background, so I've created a blue layer as shown below. Then I duplicated the image layer twice to end up with three copies of the working layer. Hide the top two layers and select the layer at the bottom of the pile. To the right of the name on the layer itself, double click to bring up the Layer Style dialogue box.
![]()
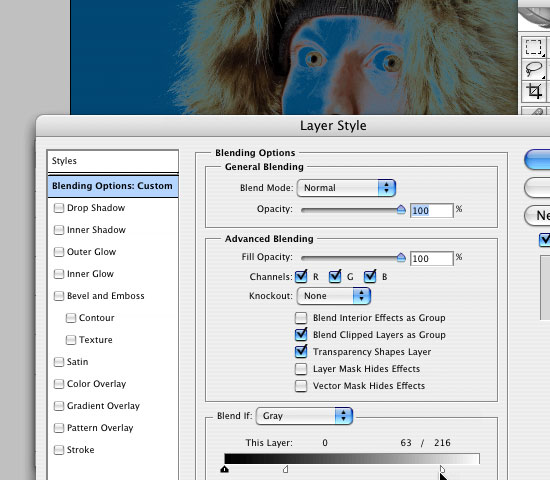
At the bottom of the Blending Options panel you'll see two sliders. With the image visible beneath, drag the little white pointer at the right end of the top slider. As you drag it to the left, the white and light areas of the image will start to vanish. However, the effect is rather brutal and unsubtle. To get a smoother blend, press the ALT or OPTION key, and whilst holding it down drag the left half of the same pointer to the left. It will detach itself from the right half and you can move the two halves independently of each other until you're happy with the look of the hair or fur against the darker background. Click OK.
![]()
Now select the next layer up, make it visible and change the blending options to Multiply in the popup menu. Then select the top layer and make it visible.
![]()
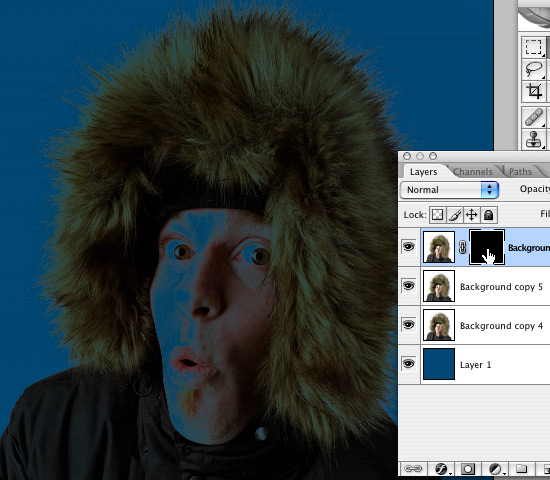
With the top layer selected, click the ADD A LAYER MASK button at the bottom of the Layers Palette. Click on the layer mask within the layer, select all and press DELETE.
![]()
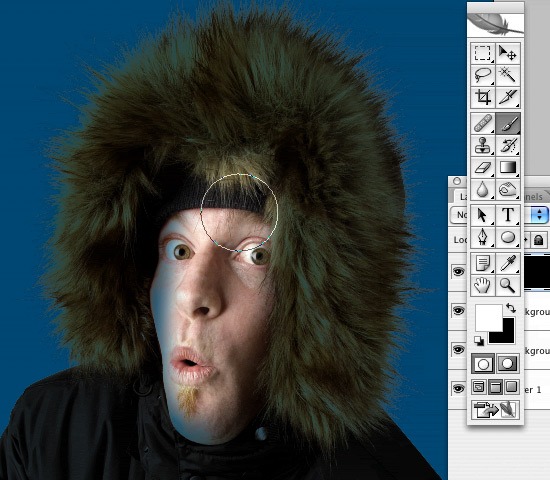
With the layer mask still selected, choose a feathered brush of an appropriate size and start painting in the areas that won't be blending with the background. You'll end up with a nearly-finished result.
![]()
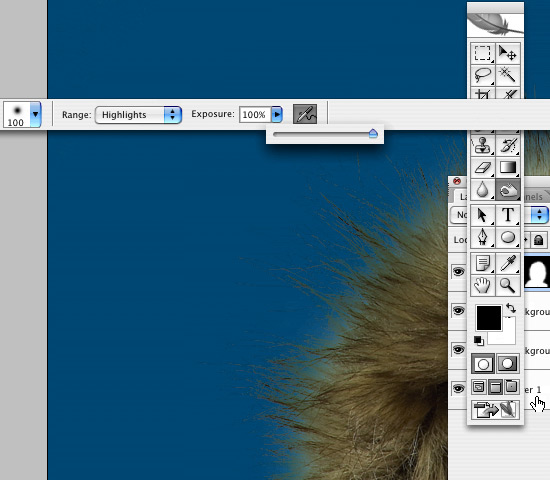
If there's a white halo around the edges of the fur or hair, select the burn tool. In the options palette set the Range to Highlights and Exposure to 100%. With the layer (not the layer mask) selected, brush around the edges to burn out the halo effect.
![]()
And there you have it - obviously this method works best if there is a white or very light background, but hopefully this tutorial will have shown you a new method which can be customized according to your needs. Thanks for reading!
![]()
How to Cut Out Hair in Photoshop - Tutorials
Below are all the tutorials I created so far to demonstrate different ways to cut out hair using Photoshop:
Resources & More Information
- Adobe Photoshop CC
- Free and Royalty Free Stock Images
- Photoshop Cutouts that Blend
- Click to go to top of Hair Cutout in Photoshop page