Gimp vs Photoshop - How to Install Gimp on a Mac and Some First Impressions
Gimp vs Photoshop / Beginning Gimp tut / How to Use Gimp
Gimp is effectively (in a limited way) free Photoshop Mac and PC compatible
If you're looking for a free copy of Photoshop for Mac, the best (and legal) thing for you to do is to download Gimp (GNU Image Manipulation Program). Gimp is free software and is part of the GNU free software operating system Project. This page focuses on getting Mac users started with Gimp, and contains my first impressions of Gimp vs Photoshop. This article is primarily for anyone who has never installed or used Gimp before, and wants to know what to expect in the first ten minutes. Gimp 2.6 is the version I installed for the purposes of this article.
Gimp vs Photoshop / Beginning Gimp tut / How to Use Gimp
Installing Gimp on a Mac
In order to run Gimp on Mac OS X you'll need to install Apple's X11 environment (although it may already be installed, as was the case on my G5 running Snow Leopard 10.6.1). If you don't have it already, it's included on the "Optional Installs" package on the OS X install disk. Alternatively you can download it from Apple.
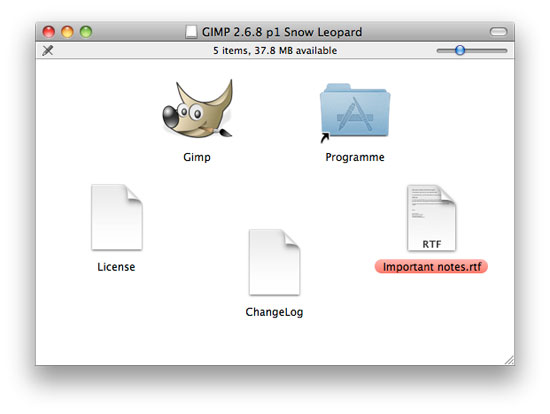
To download and install Gimp on your Mac, visit Gimp and click the Download link at the top of the site. It will take you to a page where you need to select a version appropriate for your operating system. Once downloaded, mount the disk on your desktop (this should happen automatically) and you'll see a window open like this:
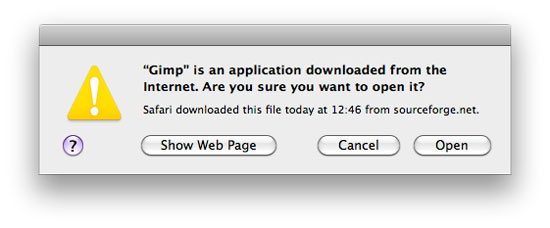
Drag the Gimp icon to the Applications folder shortcut (this version was about 230MB), locate it in Applications, and double click to launch. Click Open on the following dialogue box:
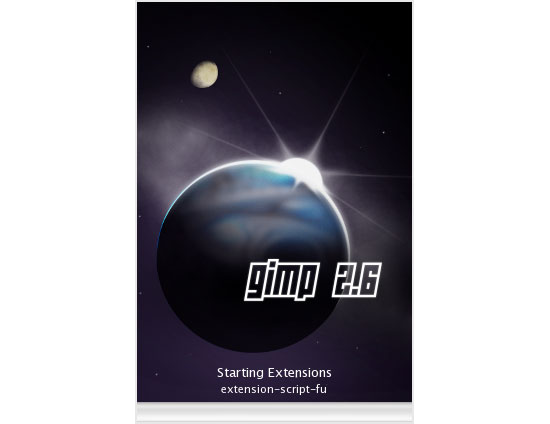
After waiting for a few seconds (be patient), the following application splash screen should appear while the program loads:
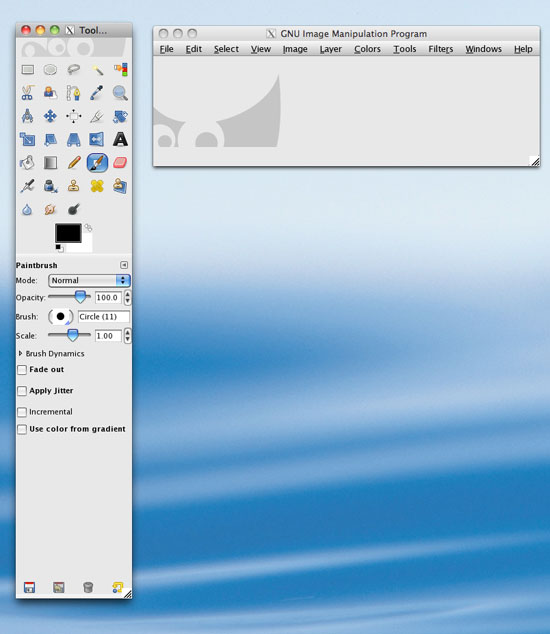
Once loaded, the first thing you'll notice is that The X11 Application is the one which appears in the top left corner of your screen instead og the name 'Gimp'. This means that all the tools (including the Gimp main menu panel) are floating, rather than fixed to the top of the screen. You won't find any main menu options in the usual place. This is what the panels look like:
Gimp vs Photoshop / Beginning Gimp tut / How to Use Gimp
Using Gimp
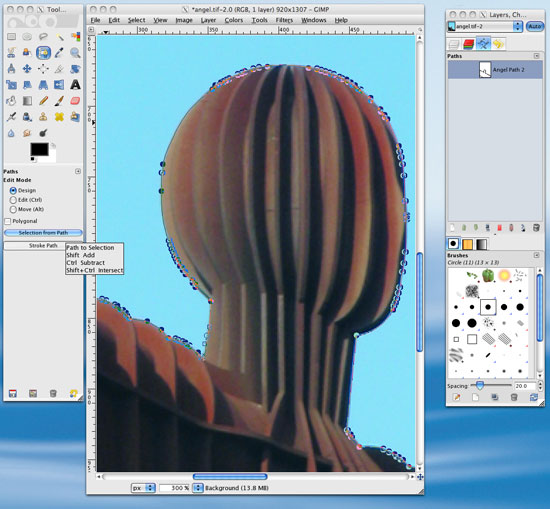
The first thing I wanted to try when opening Gimp 2.6 was to see if I could work out how to use it intuitively, having used Photoshop exclusively for years. I opened one of my Photoshop TIFF files and within a couple of minutes I had successfully created a perfectly good path around an object without any major problems. Only one thing annoyed me until I got to the bottom of it. The Command+Z undo keyboard shortcut seemed to get rid of the whole path rather than a single anchor. I discovered that the path was still there - I just had to double-click on the path icon in the Paths palette. It is better to use the Edit/Undo Add Anchor option straight from the menu.
The Path submenu allows you to save the path, stroke it and most of the other usual things that are available in Photoshop. The Layers, Paths and Channels palettes are laid out very similarly to Photoshop, so it's easy to find everything. A few keyboard shortcuts are different, but after experimenting with various variations of the ALT / CONTROL and COMMAND keys, I soon got the hang of it.
Gimp vs Photoshop / Beginning Gimp tut / How to Use Gimp
Some Similarities and Differences
Another difference from Photoshop (and most other programs I have used) is that you have to double-click tools, layers and paths etc in order to select them. This takes a little getting used to, but it's not a big deal.
You can save images in pretty much any format, although I noticed that there was a notable absence of a CMYK color mode option. This wouldn't be much of a problem for an everyday user, but for graphic designers or pre-press professionals, it would become an issue. I managed to open a CMYK TIF file and it converted automatically to RGB after displaying the following message:
/Users/Mac/Desktop/angelcmyk.tif: wrong data type 7 for "RichTIFFIPTC"; tag ignored
If you're going to place the image in an InDesign or Quark document, this would not present a problem because when you output a press-ready PDF/X1-a:2001 document, the RGB images are automatically converted to CMYK for you. However, if you really need CMYK support in Gimp, there are developers who've created plugins which will provide support for the CMYK color mode.
Gimp vs Photoshop / Beginning Gimp tut / How to Use Gimp
Basic image tasks in Gimp
Many of the features in Photoshop can be found in GIMP, although some might have slightly different names - for example, Image Size… in Photoshop is Scale Image… in GIMP and so on. Many of the main filters (Gaussian Blur, Sharpen etc) are present, as well as a few unfamiliar ones. The tool icons are nicely designed and intuitive - just play around with a few and you'll soon get the hang of them.
The most common image tasks that I perform most often (using Photoshop) are resizing, cropping, tweaking levels, creating a new layer from a selection, and saving web-optimised JPEGs. Gimp managed these tasks easily:
Photoshop Image/Image Size… = Gimp Image/Scale Image…
Photoshop Image/Canvas Size… = Gimp Image/Canvas Size…
Photoshop Image/Adjustments/Levels… = Gimp Colors/Levels…
To save an image for web use, just select the JPEG option in the file types window and tweak the advanced options which appear on the dialogue box. As for creating a new layer from a selection, Photoshop's Layer/New/Layer via Copy is really handy and I couldn't find a Gimp version of this. No problem though - you just copy the selection, create a new layer and paste your selection into it. It will stay in exactly the same x/y location on the canvas as it was copied from. If you did that in Photoshop it would default to pasting into the centre of the canvas.
These were just my first impressions of Gimp - and considering that this is a free program, I was hugely impressed. It's professionally laid out, intuitive, familiar and above all, free. An excellent alternative to Photoshop if your pockets are shallow.
Browse the online Gimp User Manual | Visit the Gimp | Visit the GNU Project
Resources & More Information
- Photoshop Clipping Paths
- Free Method of Converting Quark to InDesign
- 4 Color Process Printing and Spot Color Printing - What's the Difference?
- Return from Gimp vs Photoshop to Home